
Platform
Getting a teacher account
Why signing up does not make you a teacher yet, what approval changes, and what to do while you wait.
Signing up does not make you a teacher. A person decides that, by hand, after you have signed up. This surprises everybody, so it is the first thing on this page.
Why it works that way
A teacher account can see other people’s children: their names, their scores, their work. Handing that out to anyone who ticks a box on a form would be a bad idea, so it is not handed out on a form. You sign up, you tell us where you teach, and someone at UAVProg reads it and decides.
Until they do, your account works — you just cannot create a class.
Signing up
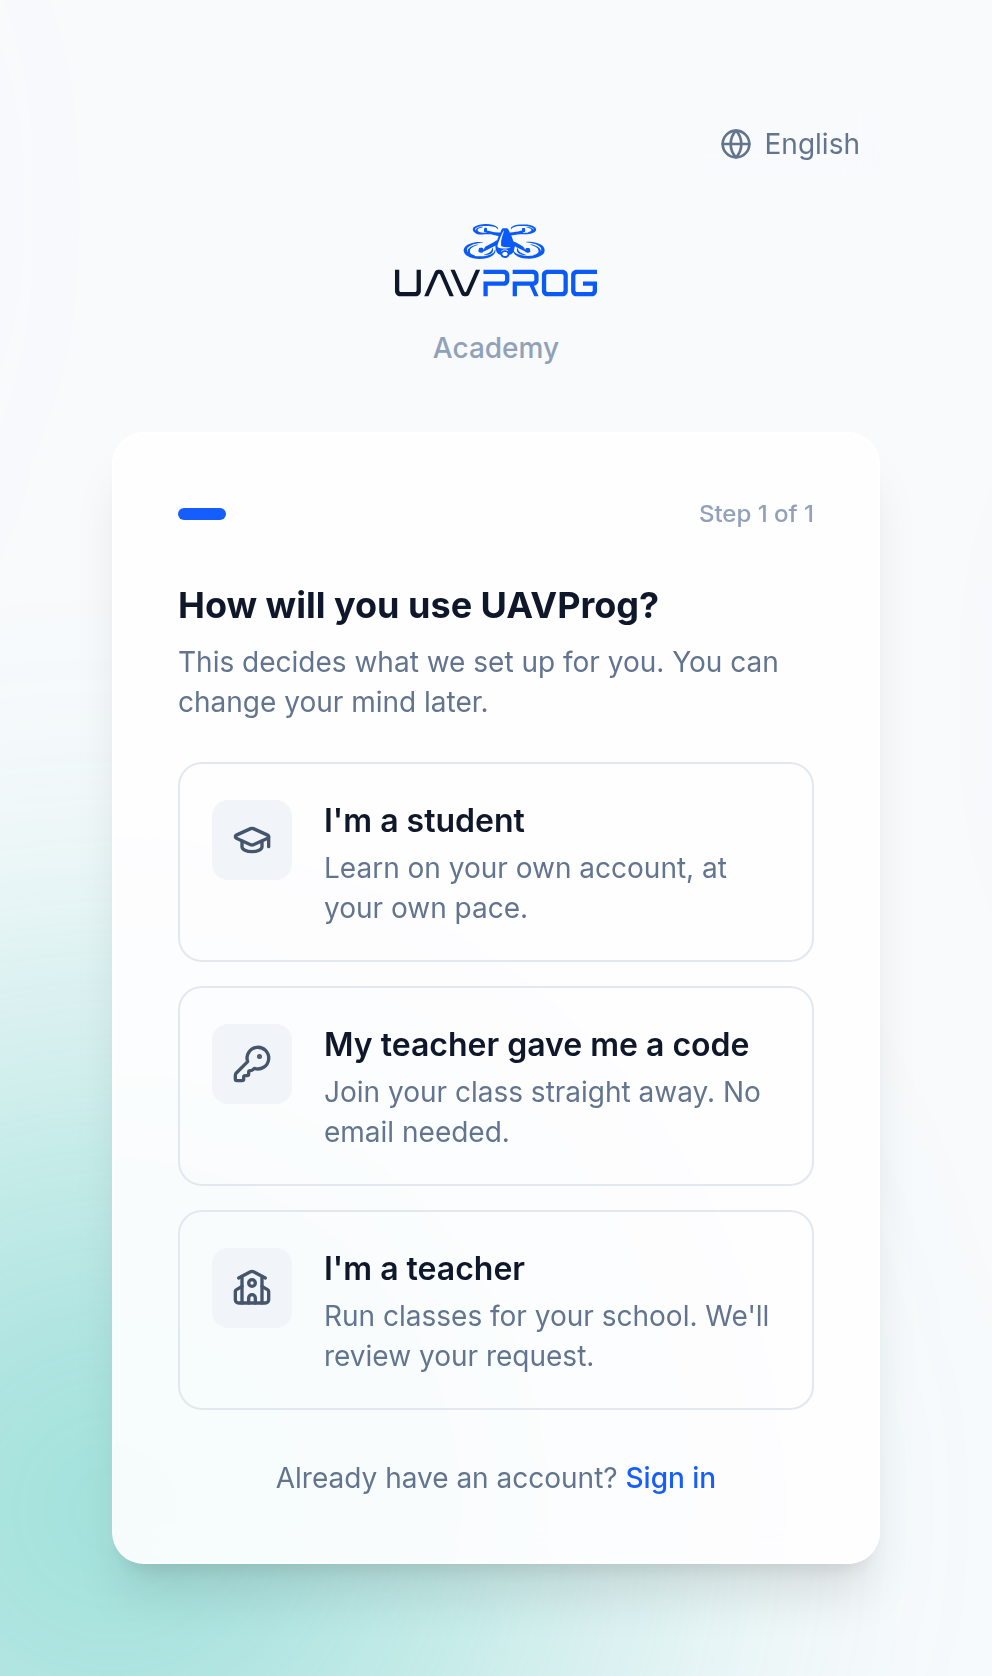
Choose “I’m a teacher” on the first screen
The very first question decides everything that follows, so it is asked first. Pick the third option. The screen tells you plainly: “Run classes for your school. We’ll review your request.”
Make your pilot card
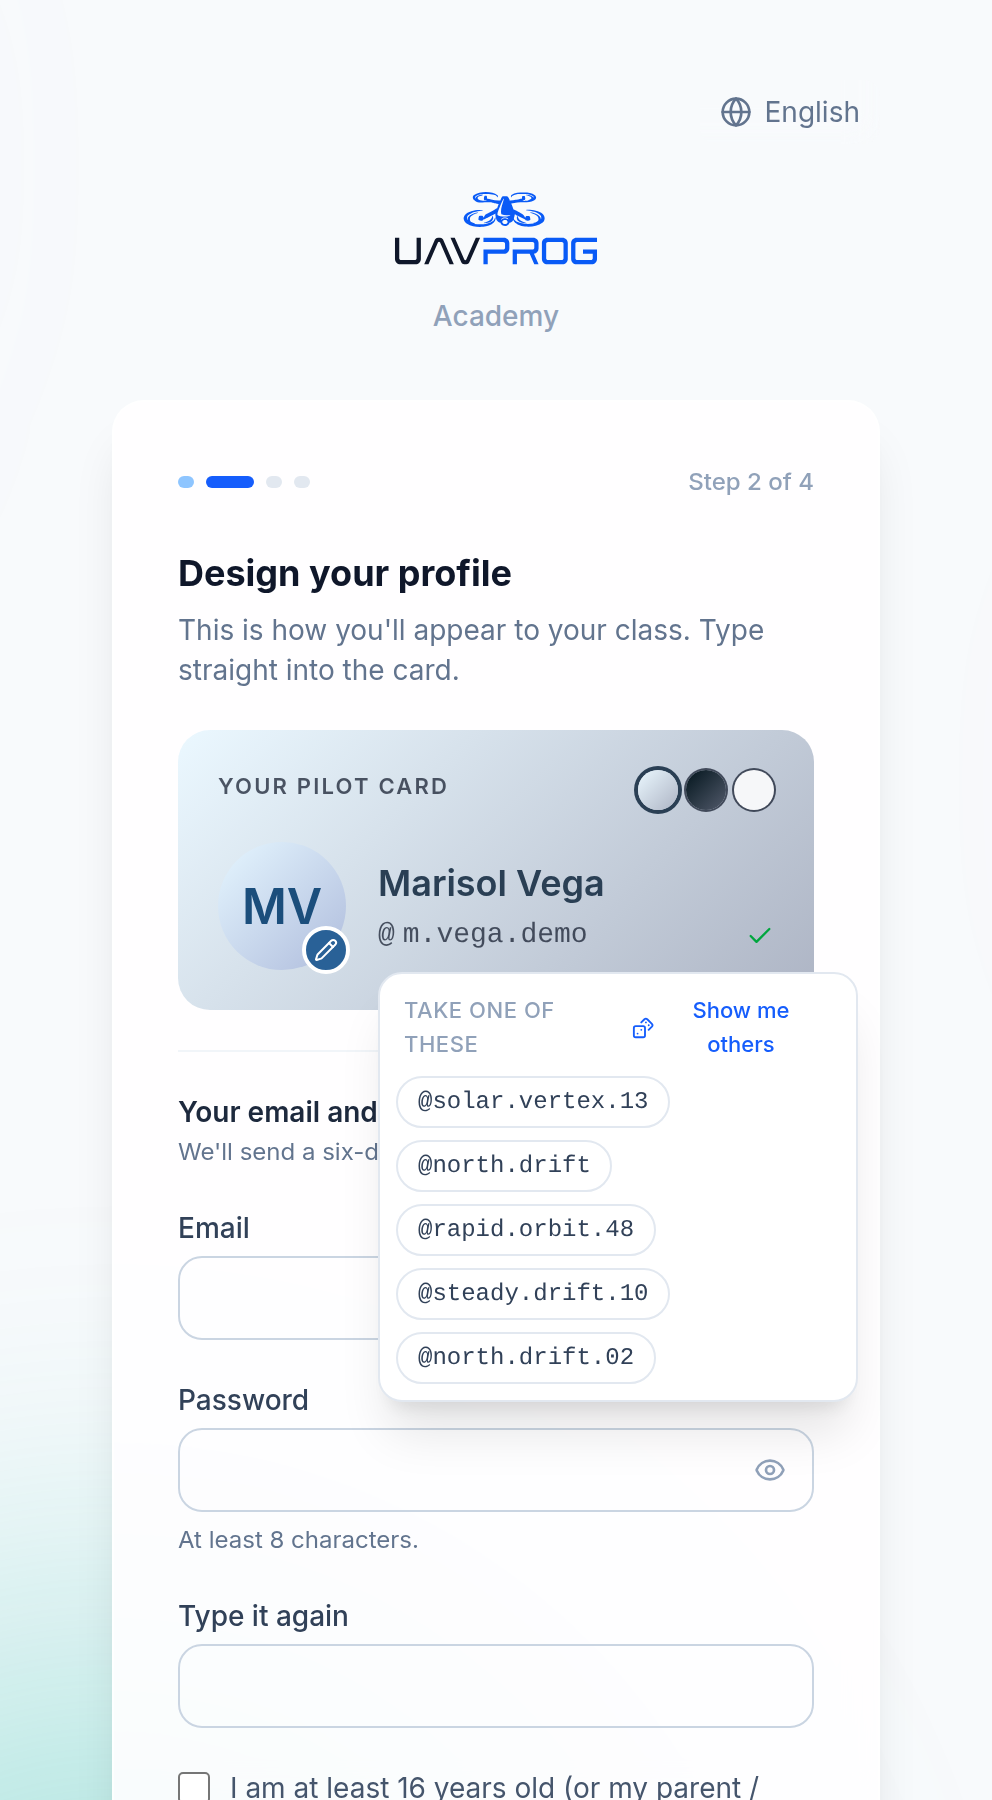
Your name, a callsign, and a badge. The callsign is a short public name — your students will see it. If you cannot think of one, the field offers ready-made suggestions; take one.
Every suggestion it offers is one you can actually have. It will not offer a name and then refuse it at the end.
Confirm your email address
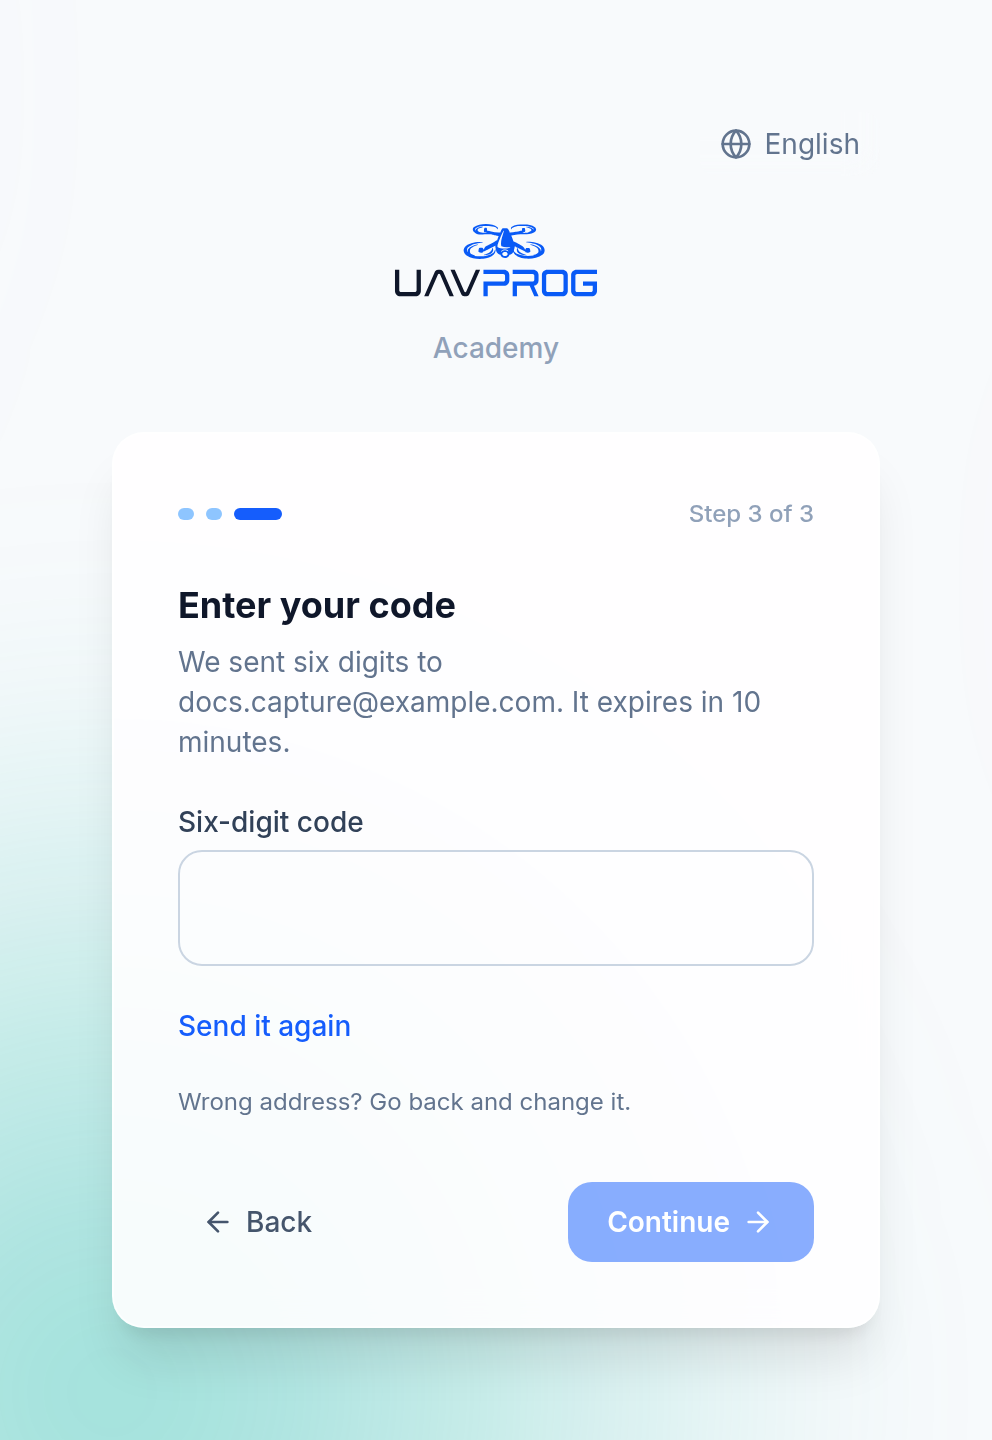
Six digits arrive by email. They expire after ten minutes; if yours does, press Send it again. Wrong address? Go back one step and correct it — a fresh code goes to the new address.
Tell us where you teach
School or organisation, your role there, country, and anything else we should know. Only the school name is required, but the more you write the faster this goes.
The screen then asks you to do one more thing, and it is worth doing:
Write to us from your school address as well. Seeing a message from the school itself is what lets us approve you quickly.
There is a button that opens a pre-filled email. Press it and send. An email from
you@yourschool.eduis the single strongest piece of evidence that you are who you say you are, and it usually turns a wait into a same-day approval.
What you can do while you wait
Everything a student can do. That is not a consolation prize — it is the best possible use of the wait.
- Take a lesson yourself. Open a course from your dashboard and fly it. You will understand the work your class is about to be given in about fifteen minutes, and you will find out where it is confusing before thirty children do.
- Join someone else’s class. If a colleague already teaches here, their class code works for you exactly as it works for a student. Being a member of a class costs you nothing later and does not interfere with your own class when it arrives.
- Read the rest of these pages. Particularly The three kinds of student account, because that decision is easier to make before you have made it than after.
What you cannot do is create a class. The My Classes tab is simply not in the menu bar yet.
What changes when you are approved
Three things happen at once, in one action, and they cannot come apart:
- Your role becomes teacher. The My Classes tab appears in the menu bar
and
/teacherstarts working. - You are attached to a school. Either one that already exists on the platform, or a new one created from the name you gave. Your classes belong to that school, and so does the school-wide seat limit that Your class and its code explains.
- You are given a limit on how many students you may have. A number, counted across all of your classes together. See the two limits.
You are never left half-way — a teacher with a role but no school could not create a class and would just see an error, so the platform does the three together or not at all.
If you are rejected
A rejection always comes with a written reason, and that reason reaches you. Whoever decided it cannot submit the refusal without typing one, and the wording they typed is carried into the notification you receive — a refusal you cannot act on is a wall, not an answer.
Read the reason, fix what it names, and write to UAVProg from your school address. Almost every rejection is “we could not tell that this person is really at this school”, and one email from the school domain solves it.
For the administrator approving these
If you are the person on the other side of this, the queue is at Admin → Teacher applications.
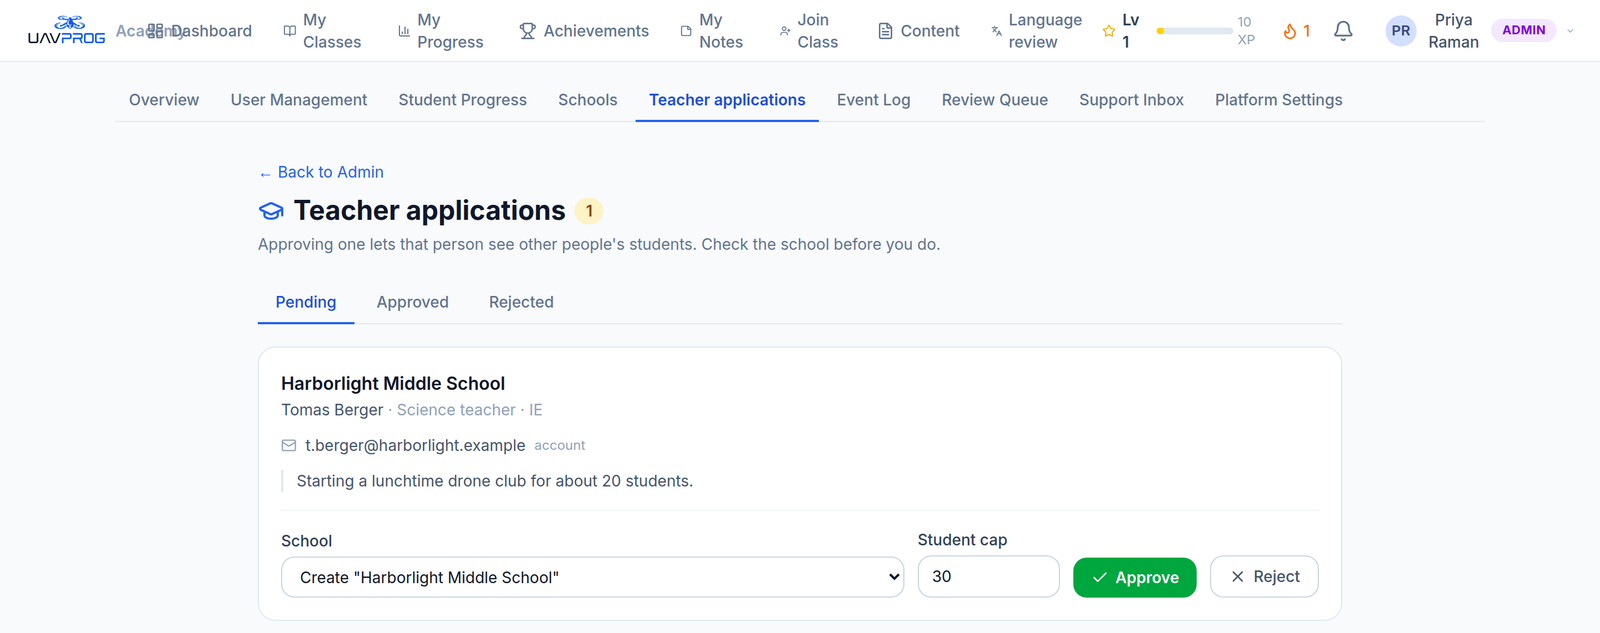
The approval queue. Approving attaches the school and sets the student cap in the same action that grants the role.
Three things are worth knowing before you click:
- You set the student cap here. Leave it blank and the platform-wide default applies (30 unless an administrator has changed it in Admin → Settings).
- Two admins cannot both decide the same application. The row is locked while a decision is being made; the second one gets told it has already been decided.
- A rejection requires a reason and an approval does not. That asymmetry is deliberate.
Next
→ The three kinds of student account — read this before you invite anybody.